 No professional workshop needed
This is not a carpentry plan to follow to the millimetre: it is a hands-on account. What I salvaged, what I bought and the tricks that helped me build my cabinets.
The result is not perfect, but there is the satisfaction of having made it yourself. And the cabinet can evolve: you change the equipment without rebuilding the whole structure.
A friend started from an old second-hand wardrobe, sanded down: a vintage piece that fits his living room, with doors that close to hide the setup. Your starting point may be very different from mine.
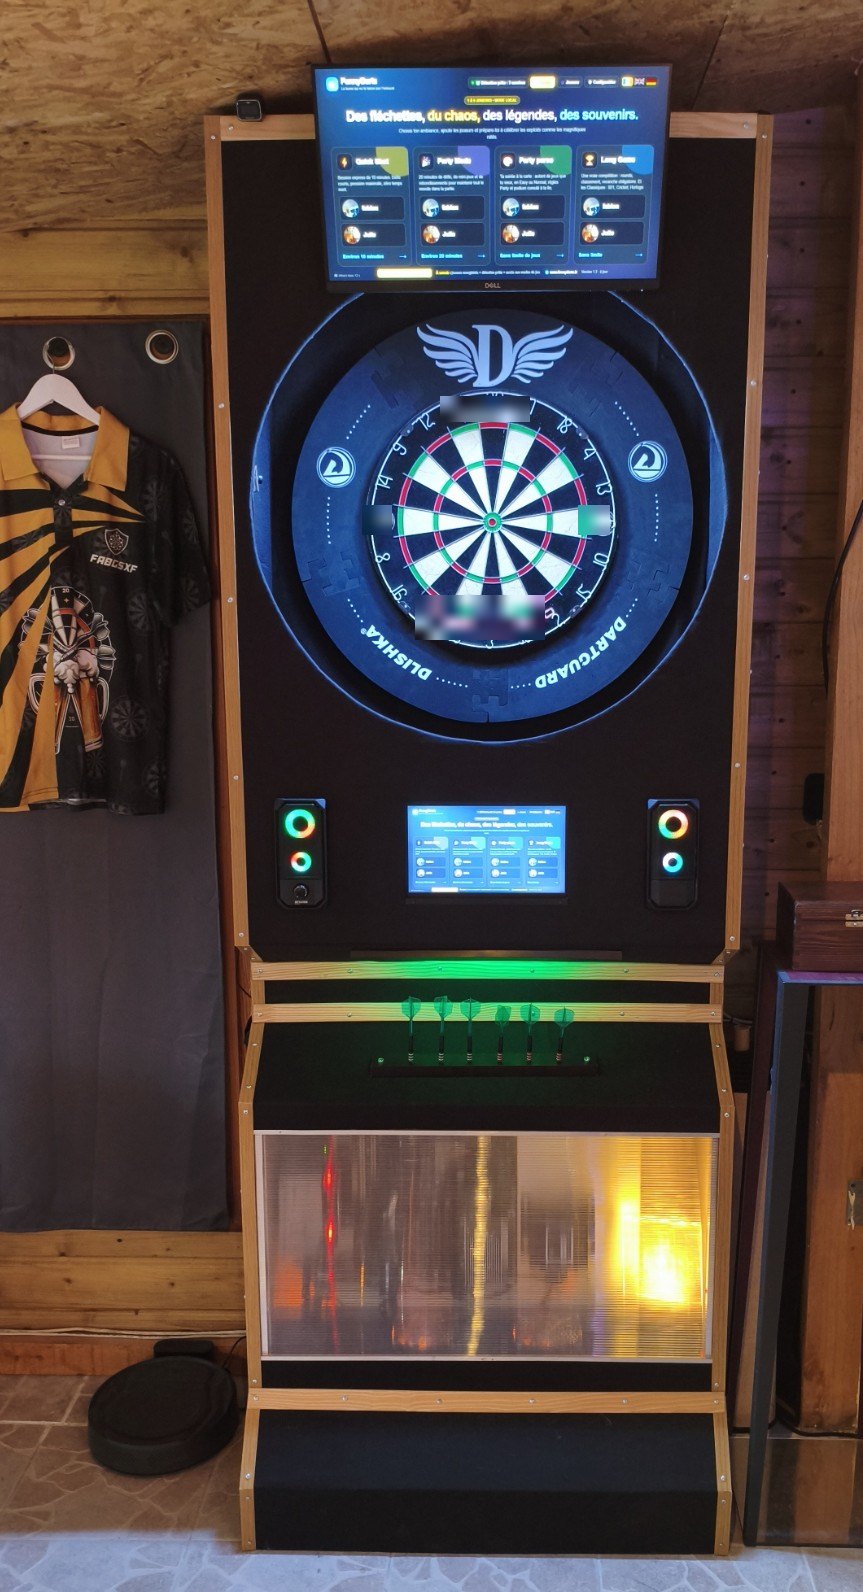
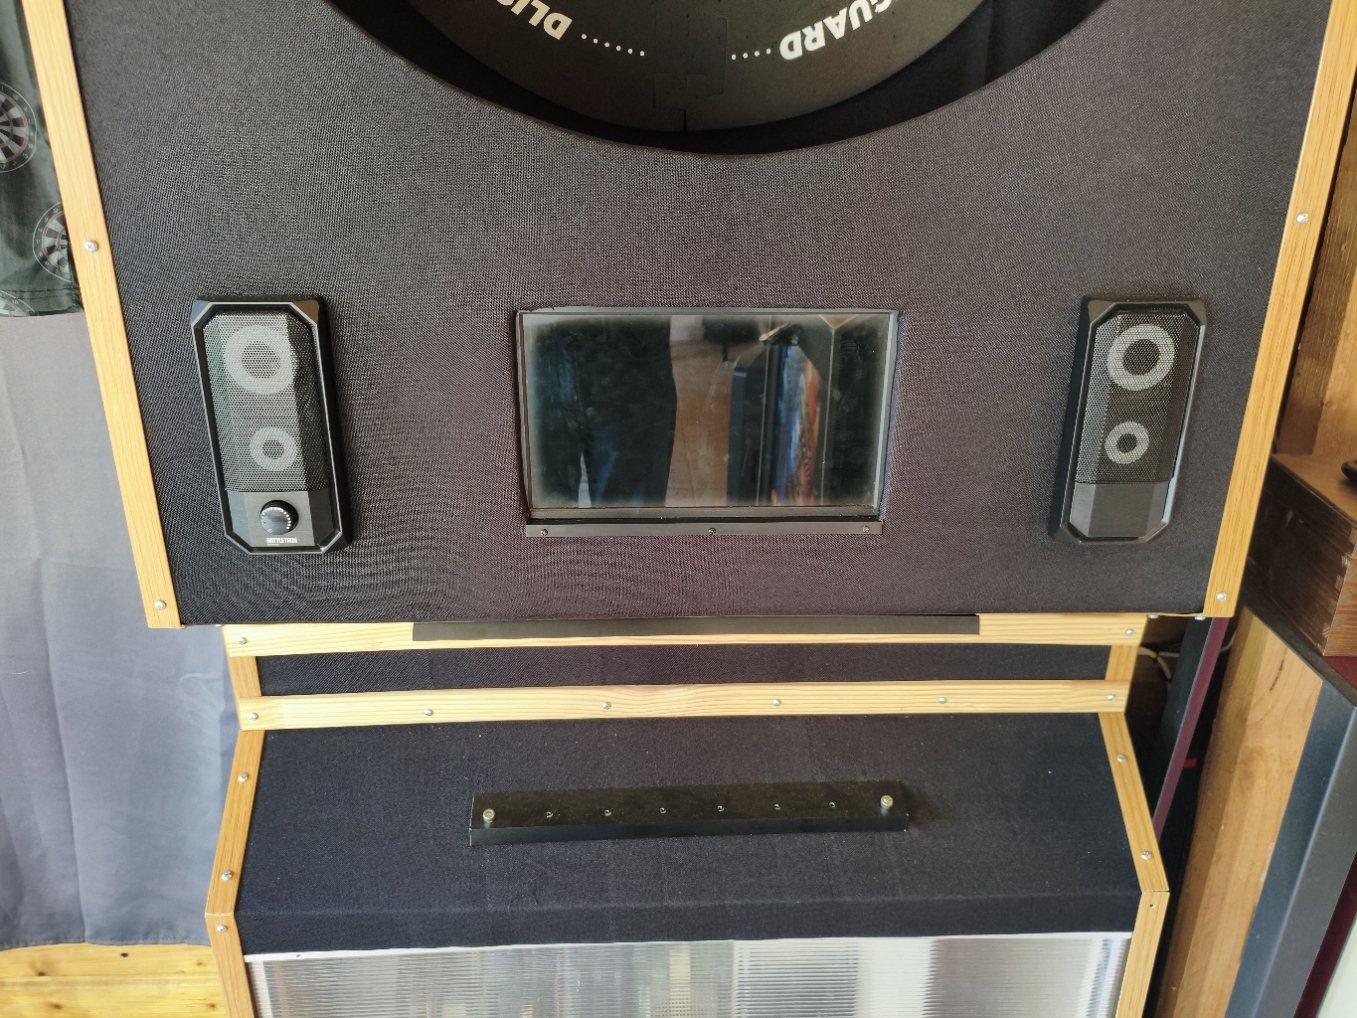
 The camera sisal cabinet (
 FunnyEye)
A false back about 40 cm deep gives about 38 cm between the lenses and the board. The cameras sit on the edges: no need to buy special arms.
The base widens to 50 cm deep over the last 10 centimetres of height. A wall fixing at the top secures the whole cabinet against tipping over.
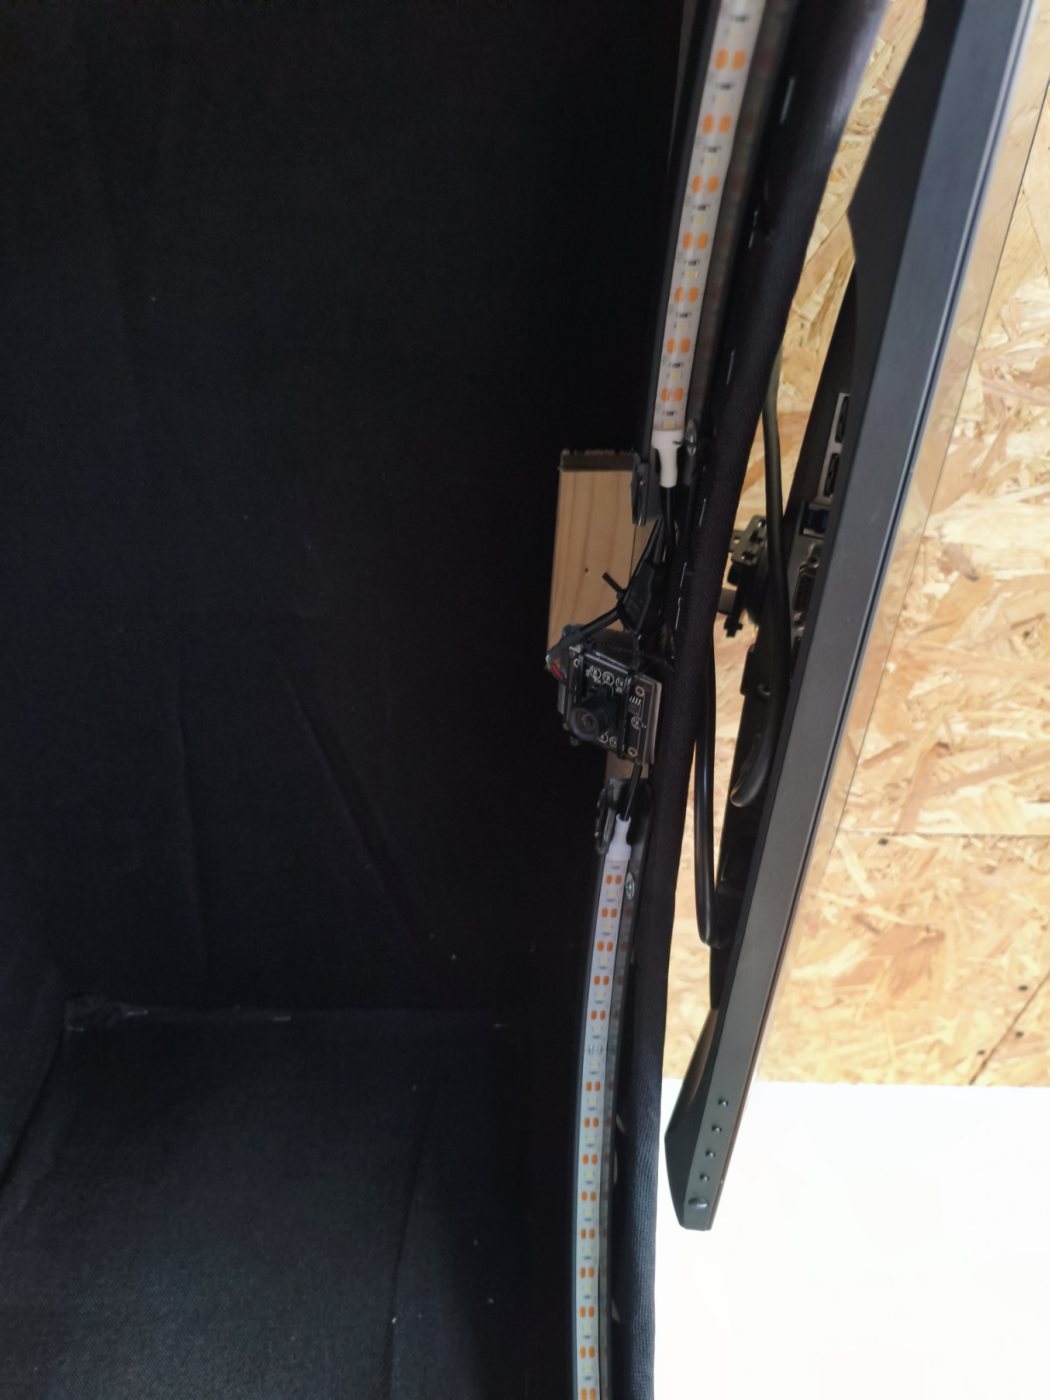
Brackets adjusted by hand
Small strips of soft salvaged metal (like the side of a tin can) bend to aim the cameras. Test the framing before finishing the fixings; deburr or protect the edges.
 Metal conducts electricity: never put a camera's circuit board directly on a metal bracket (short circuit, camera destroyed). Insert foam or tape made for electrical insulation, and do the assembly with the power off.
Simple lighting
A white LED strip (bought at Action) glued onto a half-circle of flexible PVC, hidden behind the edge. A well-lit board without strong shadows helps detection a lot.
Before drawing the circle
Order your surround first: it can serve as a template. Fit any adjustable feet, level the cabinet, then place the centre of the board at the official height:
Only then draw it.
Inside the cabinet: salvage first, then equip as you like
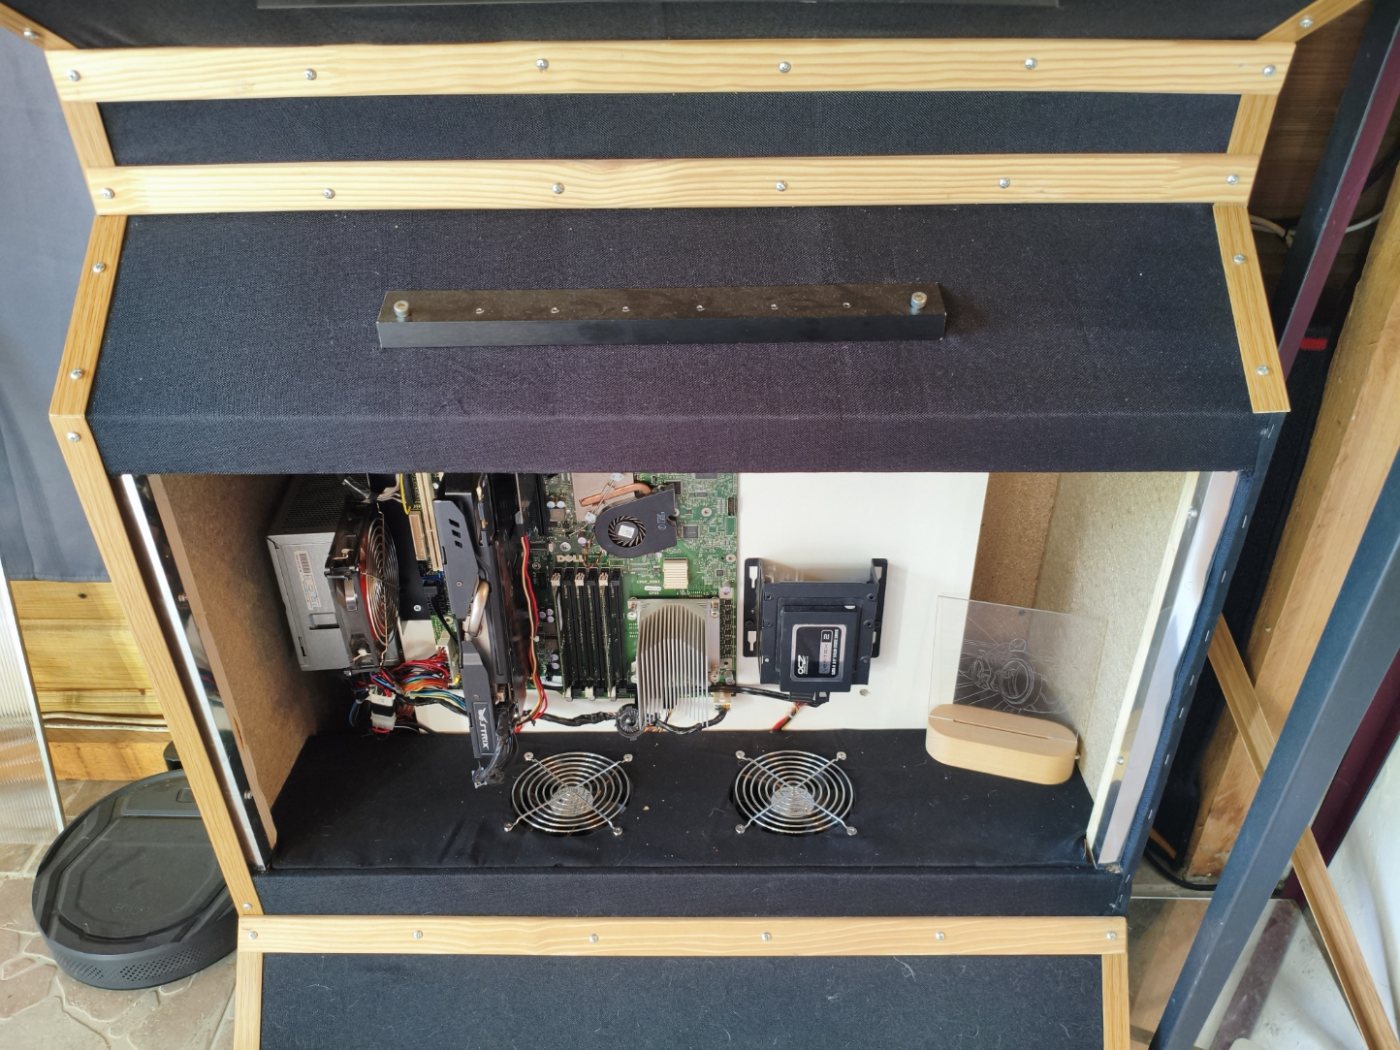
- The PC: found at a car-boot sale, with a Windows 11 licence. An HDMI splitter (1 input, 2 outputs) sends the same picture to both screens: pick a resolution both accept.
- The controls: an 11.6-inch touch screen. A keyboard and mouse are enough: touch is a comfort, not a must.
- The cameras: three OV9732 USB cameras (100°, 1280 × 720, 30 frames/s, 2 m cables) for FunnyEye. The scene webcam was lying around in my attic.
- The atmosphere: a salvaged translucent panel (garden shed glazing) closes the PC compartment; 12 V LED motorbike indicators behind the fans make the “flame” effect. Optional!
My salvaged lighting is powered by the 12 V output of the PC power supply. This requires skills: check with a multimeter, insulated and protected connections, don't trust wire colours, never open the power supply, keep the airflow clear. To keep it simple: plug-and-play lighting.
Before buying the cameras, read the Windows user guide: FunnyDarts finds the board on its own, then the guided calibration only takes a few minutes.
 The electronic Bluetooth cabinet (FunnyLink)
This cabinet was designed for my GB132 electronic board. No false back for cameras: a space behind the panel is enough to hide the wires and keep the connections reachable.
The base is 50 cm deep. The 80 cm width gives a protection zone around the board to spare the wall. I wanted an imposing, visible cabinet, but a much slimmer version is possible.
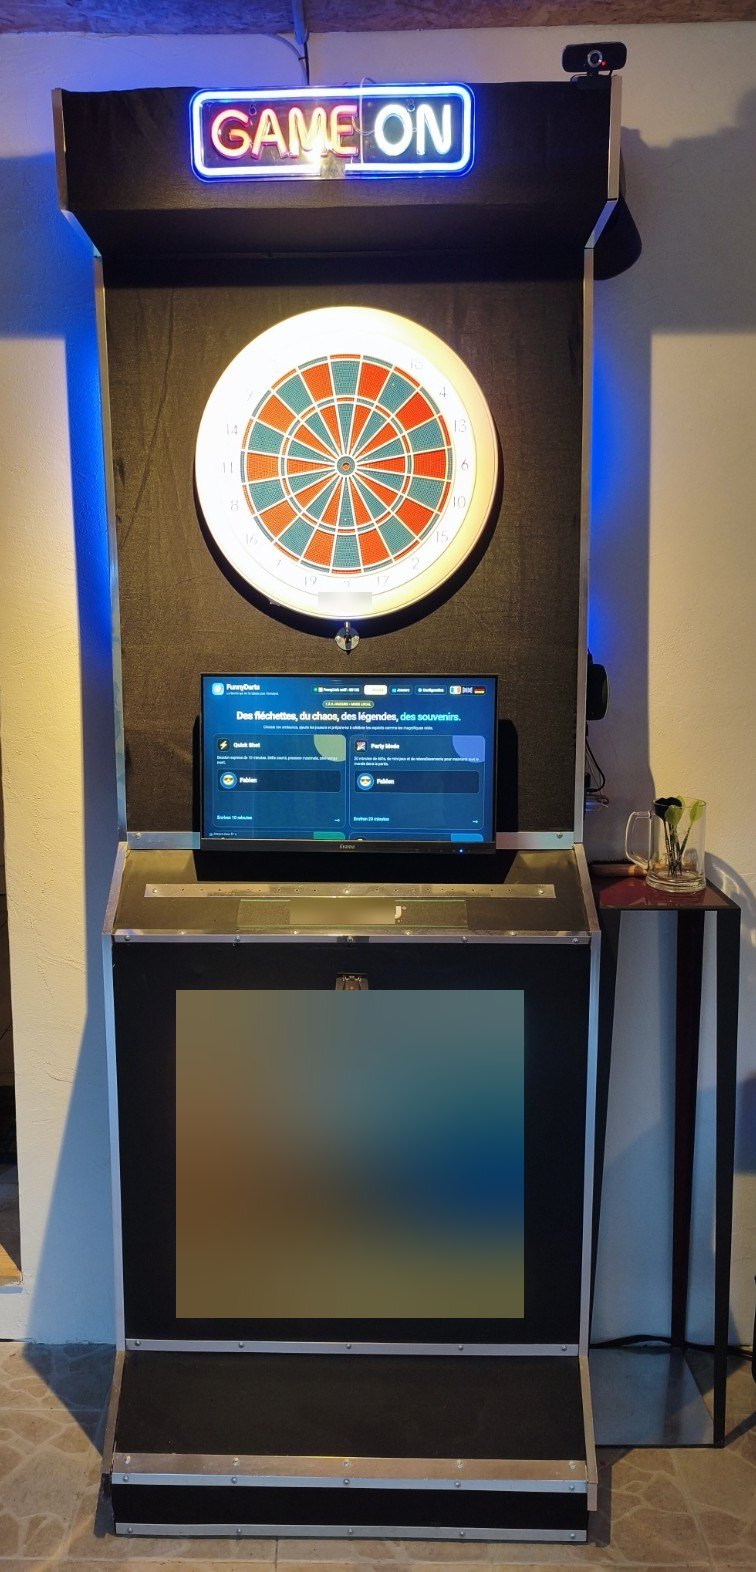
Fixing and lighting
The board clips onto the three screws provided by the manufacturer: follow its mounting template. For lighting, an LED spotlight fixed to the ceiling and aimed at the board.
The equipment
The board sends its darts to FunnyDarts over Bluetooth ( FunnyLink): a Windows PC, a phone, a tablet or an Android box is enough. What each device can do → At home I use an H96 MAX V58 box (RK3588, Android 12, 8 GB RAM): reliable in my setup, but not a must-buy.
My experience with USB power
With a small touch screen powered by the box, I had picture drop-outs during some animations. A screen with its own 230 V power supply solved it. Depending on your devices, plan a powered USB hub: an unpowered hub adds no power at all.
How I switch this cabinet off
A household switch on top controls the power strip. This mains wiring requires skills: call a qualified person if needed. A power strip with an accessible switch also does the job. Prefer shutting down from the software when possible, and never cut the power during an update.
 The starting point: a few materials, lots of possibilities
For the sisal cabinet: eight salvaged 9 mm OSB panels of 80 × 120 cm (two for the front, one for the back that carries the board, the rest for the sides and parts).
To salvage or find second-hand
- 9 mm OSB, or thin sliding wardrobe door panels.
- Battens for the frame and reinforcements.
- Cheap curtains (NOZ, Action…) for the covering.
- Corner strips, screws and staples.
- An old wardrobe can also serve as the structure.
The tools
Circular saw (straight cuts), jigsaw (openings and shapes), staple gun (fabric), tape measure, square and drill-driver. Hold the pieces firmly while cutting and wear suitable protection.
The steps
- Imagine: start from your materials and your space. Full cabinet, wall-mounted half cabinet, storage or visible PC: choose your shape.
- Build the frame: assemble the battens and add reinforcements for the board and screens. Thin panels must not carry heavy equipment on their own.
- Mark and cut: place the board at the right height before marking. Plan for the feet, the screens and the cable routes.
- Cover: stretch then staple the fabric, placing the staples where the trim strips will hide them.
- Equip: mount the board following the manufacturer's fixings (central bracket for sisal, three screws for the electronic board). Test lighting, framing and connections.
- Secure and enjoy: fix the cabinet to the wall with suitable fasteners, keep ventilation free and the back accessible. Then personalise it over time.
 Technical access is from the back: leave room to work, and unplug everything before moving the cabinet. The fabric is a covering: on its own it does not protect against steel tips.
 Price guide
The budget mostly depends on what you salvage. Here is what I paid: personal reference points, not a quote or guaranteed prices.
| Item | Note | Amount |
|---|---|---|
| 6 rough battens of 2.40 m | Batch for the structure | ≈ 15 € |
| Kit of 3 OV9732 cameras | Sisal cabinet (FunnyEye) | 39,99 € |
| Sisal board surround | Sisal cabinet | 25,99 € |
| HDMI splitter | Same picture on two screens | 8,99 € |
| 11.6-inch touch screen | Comfort option | 82,60 € |
| H96 MAX V58 Android box | Bluetooth cabinet | 146,50 € |
| PC, scene webcam, panels, decoration | Salvaged | varies |
The two cabinets don't use the same equipment: these lines don't add up. Boards, main screens, fabric, lighting, cables, powered hub and fixings are still to plan for your project.
 It may not be perfect. But it will be yours.
A salvaged cabinet, a made-to-measure structure or a highly visible one: keep what inspires you, adapt the rest. Show us your build in the official Facebook group!
 Which device to choose?
 User guide